


Paid traffic is a great option for affiliate marketers looking to grow their business quickly and make commissions at scale.
We see a lot of our most successful affiliates on ClickBank using paid ads to generate massive paydays – and we have the ClickBank success stories to prove it!
So, how can you do it for yourself?
In this guide, we’re going to cover:
- What paid traffic for affiliate marketing actually is
- Which paid ad platforms are best in 2025
- What makes a winning ad campaign (with real examples)
- How to choose the right platform for your goals
By the end, you’ll know exactly how to start running paid ads for affiliate offers and start making sales! Let’s dive in.
What is Paid Traffic in Affiliate Marketing?
Paid traffic is any form of online traffic that you spend money to acquire, usually in the form of paid advertising through digital platforms like:
- Facebook and Instagram (Meta Ads)
- YouTube (via Google Ads)
- Google Search or Display
- TikTok Ads
- Native Ads (via NewsBreak, Outbrain, Taboola, etc.)

For affiliates, paid traffic is a quick way to buy attention and drive users toward a landing page (sometimes called a “bridge page”) that hosts their affiliate tracking link pointing to an affiliate offer.
When a user clicks the tracking link and goes on to make a purchase, you earn a commission on the sale!
Instead of waiting 6+ months for SEO or social media to generate enough traffic to start getting sales, paid traffic channels allow you to:
- Launch ads immediately
- Test creatives efficiently
- Scale winning campaigns fast
But keep in mind, paid traffic isn’t a business model by itself – it’s a traffic channel that funnels cold traffic to your chosen affiliate offer.
So you’ll need a landing page, tracking, and possibly some kind of lead capture system to grow your own email list for backend sales.
Section Summary: Paid traffic is a channel that gives you control and scale for affiliate marketing, as long as you have the budget to support it.
Top 3 Benefits of Paid Traffic for Affiliates
Here are the 3 biggest benefits of paid traffic for affiliates:
- Paid lets you test and validate your strategy quickly (think 6 weeks for paid ads compared to 6 months for organic traffic sources like YouTube or a blog).
- Paid can be more stable and consistent than organic traffic, as long as you have the spend to keep the traffic flowing.
- It’s possible to scale quickly with paid once you find a winning combination.
The main downside with paid traffic sources, of course, is that you ONLY get traffic when you’re willing to pay for it!
But as long as you’ve chosen a product to promote with a high enough average payout value (APV), then purchasing paid traffic is an excellent way to scale – because you can earn enough to cover your spend and then some!
And of course, a lot of affiliates do just that.
If you check out the top ClickBank traffic sources right now, paid channels round out the biggest channels for affiliate marketing (along with email):

So, let’s move on to the best strategies for paid traffic affiliates!
How to Think About Paid Traffic
A lot of our newer affiliate clients approach their entire online business with one question in mind: “How do I pay a platform like Facebook to give me money back?”
This sounds pretty straightforward, but the truth is, a paid ads platform is just a traffic channel – it’s NOT a business model! Algorithms change, and so do affiliate offers, but a loyal audience will endure.
Paid traffic is a powerful lever for growing your business, but for a sustainable and profitable long-term business, you should be thinking about the backend and treat paid ads as a lead generation tool, not an entire business on its own.
That means building an affiliate marketing email list for repeat business, growing a branded organic presence, and tracking both customer lifetime value (LTV) and average order value (AOV) across offers.
Ultimately, affiliates like you can benefit from a power traffic channel in paid ads, but once you actually generate those leads, how are you capturing them? Are you growing an email list in your ESP and nurturing your leads so you can sell to them with new offers down the road?
As we dive into some paid ads strategies below, I encourage you to think of your business as a “media company” in your chosen niche.
With this mindset, you are more likely to diversify and not be so reliant on a single offer or traffic source – and it even positions you to potentially create your own offer down the road!
3 Best Practices of Paid Traffic for Affiliate Marketing
Now, your mindset when approaching a paid ad campaign for affiliate marketing should be about one thing only: return on ad spend (ROAS).
For ClickBank affiliates, any metric prior to ROAS doesn’t really matter – including CPM, CPC, conversion rate, etc.
If you have any experience in the world of paid advertising, that might sound like a controversial statement, but it’s true – the whole point of your campaign is to turn a profit. All of those leading indicators can help you with testing and optimizing, but in terms of your overall goal, it’s ROAS or bust!
But to get to a positive ROAS of 1.0+, you need to know what to test. That’s where the three elements of hook, CTA, and creative come into play.
1) Hooks
Once you’ve done your own research or used an offer’s affiliate tools page to learn more about what your target audience looks like and cares about, it’s time to write a few different hooks that you think will catch their attention.
It’s best to keep your hooks to the point and readable. Much like for ad creative, the goal with a hook is to spark curiosity and interest.
Your hook needs to be so interesting that someone who is mindlessly scrolling on social media or intentionally watching a YouTube video would stop what they’re doing and start giving you their attention.
Use the hook in your ad to get people to consume more of the creative, which then leads to “selling the click” over to the next step in your funnel!
2) Creative
These days, your ad creative is probably the most important and overlooked aspect of media buying. Don’t let yourself get too hung up on targeting or the technical side of media buying – you can actually target the right audience based on how you frame your creative.
Once your hook is defined, find 3-5 ways to make creatives that intrigue and entice your audience. The goal of your creative is to hook, relate, and sell the next action.

For example, if you are sending traffic to an advertorial (a type of bridge page framed as an article), your creatives should drive enough curiosity to get users to click through your ad and continue reading.
Then, let the advertorial do the heavy work of selling the next click to your hoplink, and then let the seller’s VSL or TSL sell the product and get the purchase!
NOTE: When it comes to creative, test as often as you can. Test things you think will work and test things you think won’t work. Often, the best performing ads are ads that you might not even think are “good” or look “pretty.” And once you have something that works, double and triple-down on it while spending 10-20% of your budget on new creatives so you always have something fresh.
3) CTA
The name of the game for a call-to-action (CTA) in paid ads for affiliate marketing is to make it clear, concise, and easily accessible.
After a prospect has consumed your ad/content, there should be zero confusion about what to do next.
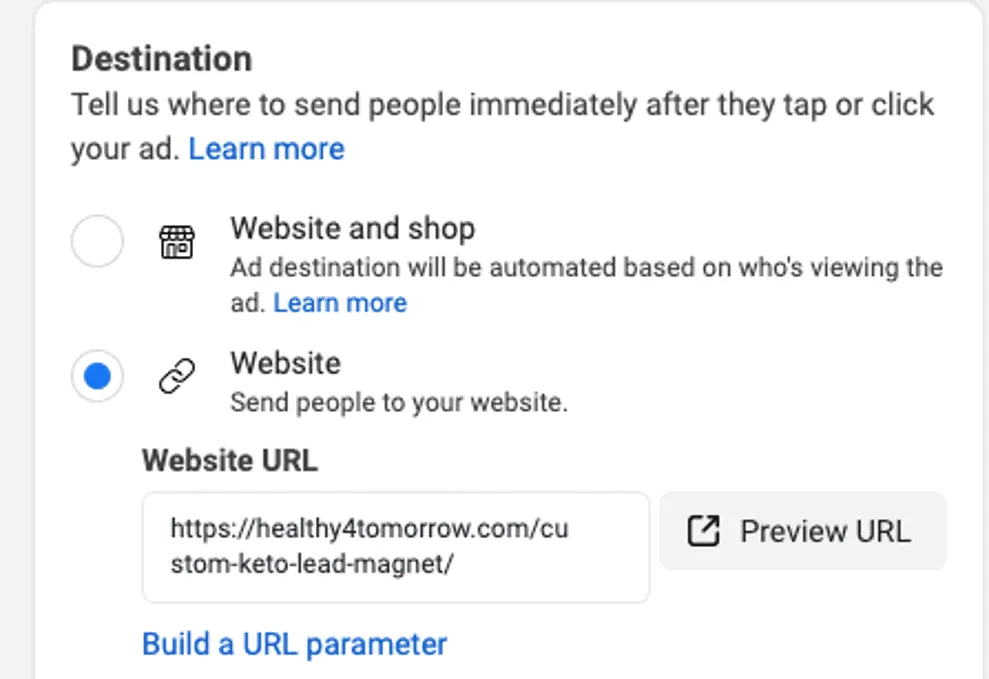
On most ad platforms, you’ll need to insert a URL or next step as part of the ad.

Most of the time, the ad will feature a small button for the user to take the next step. Make your CTAs even clearer by writing them out in your copy (if applicable) and even link the URL to the next step in the copy if you can.
The more areas where users can click to get to the next step, the better.
Putting It All Together
As important as these elements can be, today’s media buyer affiliates focus most on hooks and creativity – the things that will get an audience’s attention!
No matter what affiliate offer you’re sending traffic to, we suggest you test images, videos, AND GIFs to see what performs best.
In the end, you need to keep testing to find out what will get you results.
Eventually, you’ll develop an instinct for what works and can put the odds on your side – but algorithms and audiences are constantly changing, so testing is a must, always!
3 Best Paid Traffic Sources for Affiliate Marketers in 2025
Now that you understand some of the important facets of any paid ads campaign, I want to discuss the top 3 ad platforms for affiliate marketing.
Obviously, the best platform for you will come down to:
- Your niche and offer type (e.g. health, biz opp, beauty)
- Your creative skills (video vs image vs text)
- Your budget and goals (fast cash vs brand building)
Below, I’ve broken down the top paid ad channels for affiliates in 2025 – including what they’re good for, what to watch out for, and how to start testing each one.
I also walk you through the basic setup process for each of the biggest ad platforms out there right now.
If you follow these simple steps, you’ll put yourself ahead of 90% of people who are just fooling around on paid ads platforms without a process or a plan!
1) Meta Ads
First off, we have Meta Ads (Facebook and Instagram), which continues to be the holy grail of paid ads platforms.
Many of ClickBank’s top affiliates still swear by Facebook Ads, and when we check our internal data on top traffic sources, we still see more sales from Facebook Ads than any other single traffic source.
Pros of Meta Ads:
- Easy to launch and test
- Visual ad formats convert well
- Massive audience and top-notch targeting
Cons of Meta Ads:
- Strict ad compliance (doesn’t allow direct hoplink placement)
- Rising CPMs in competitive niches
- Ad shutdowns and account bans
Note that Meta’s algorithm is powerful. Start broad with your targeting, let the algorithm find winners, and double down on creatives that outperform.
Want to learn more?
Let’s look at how you would set up a paid campaign on Facebook!
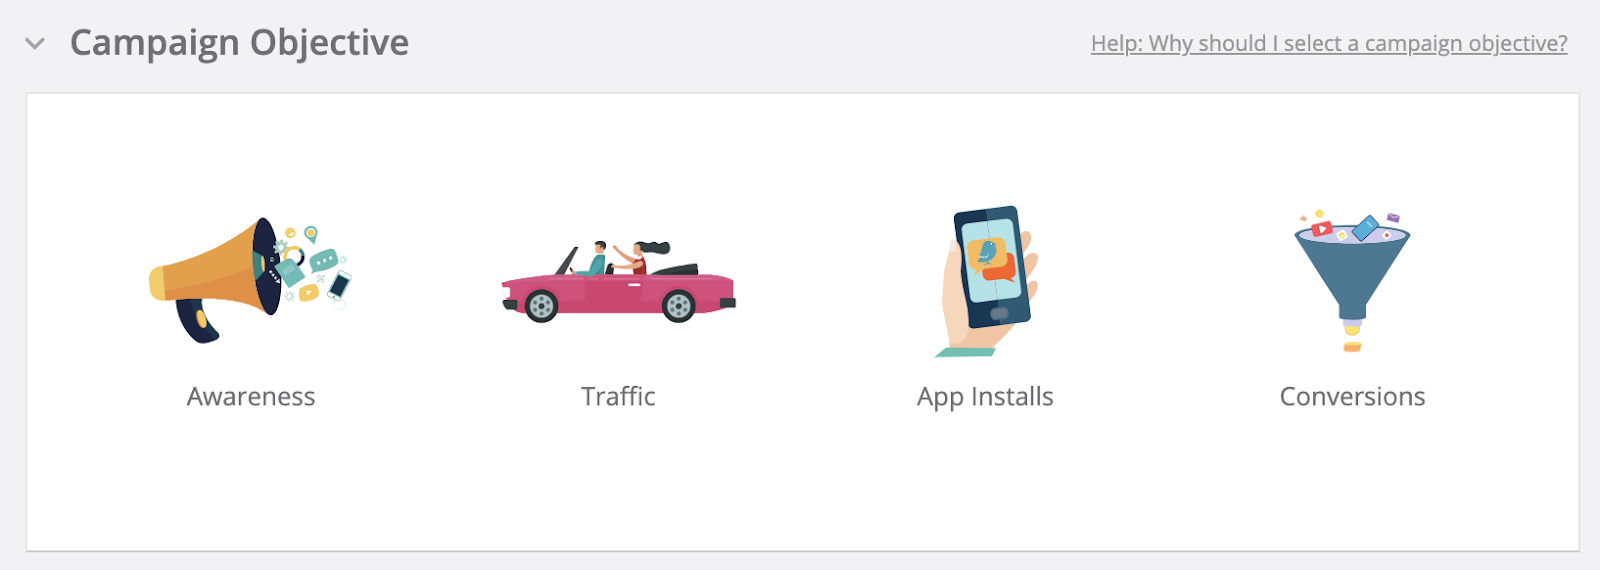
Step 1: Create a New Campaign
To get started, we highly recommend you create a campaign optimizing for conversions. Conversion campaigns tell Facebook you want your ads placed in front of people who it thinks are most likely to buy.
If you want to test other event types after you’ve seen initial traction with an offer, that’s totally fine, but in most cases, conversions will be your go-to.
NOTE: You could also set up for lead gen or CPL (cost per lead) if you are pointing traffic to a lead magnet or some sort of opt-in, but in this case, make sure you track your metrics closely to ensure that the whole campaign backs out into profitability.
Step 2: Define Your Audience
The next thing you’ll have to do is tell Facebook who your target audience is. This is where it helps to have an ideal customer profile (ICP).
As an affiliate, you should check to see if your chosen offer has an affiliate tools page. If so, this resources page should include information about who the offer’s target market is and what they look like.
In Facebook, you should insert attributes about your target market to narrow down who your ads should be served to. Take advantage of locations, age, gender, and even detailed targeting options.
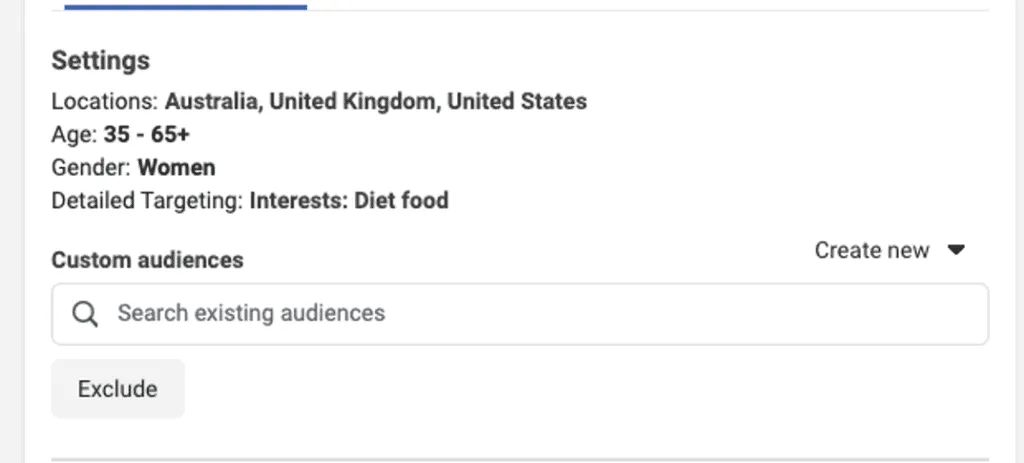
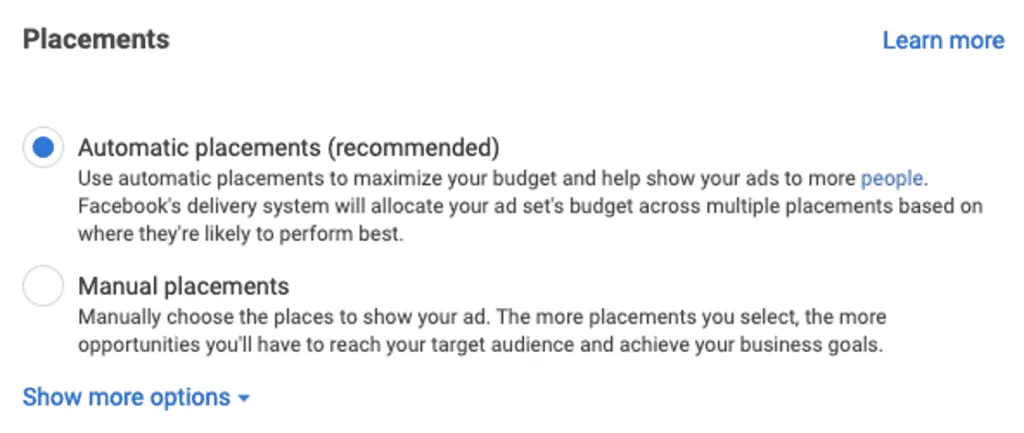
For placements, you’ll want to start with automatic. Automatic will allow Facebook to put ads where they see these buyers interacting on platform.
Facebook will also optimize for profitability here, so if one placement is outshining others, you can bet that Facebook will continue spending there.
As you are scaling, you can also launch ad sets with manual placements – but you should wait until you prove out what works and find the placements that are more profitable than others.
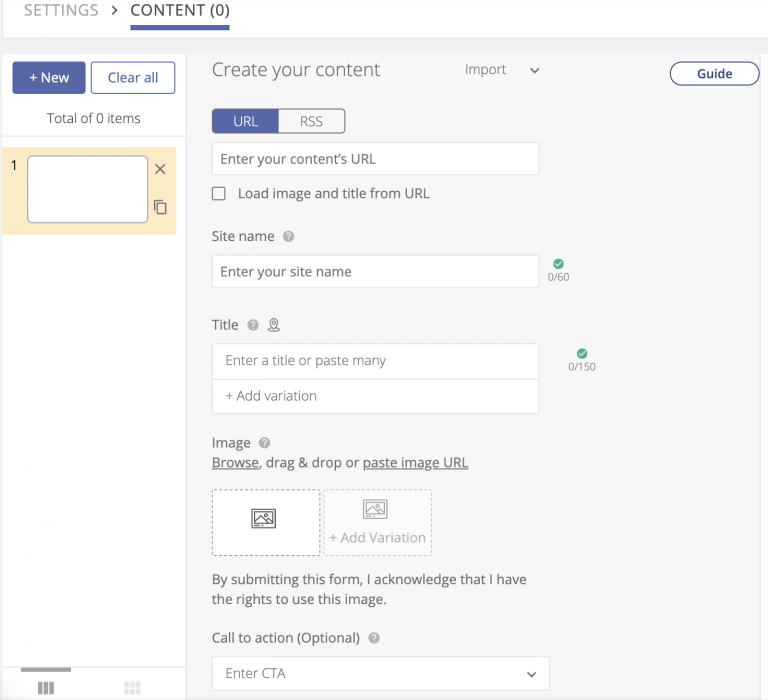
Step 3: Choose Your Ad Creative
Now for the fun part: ad creative!
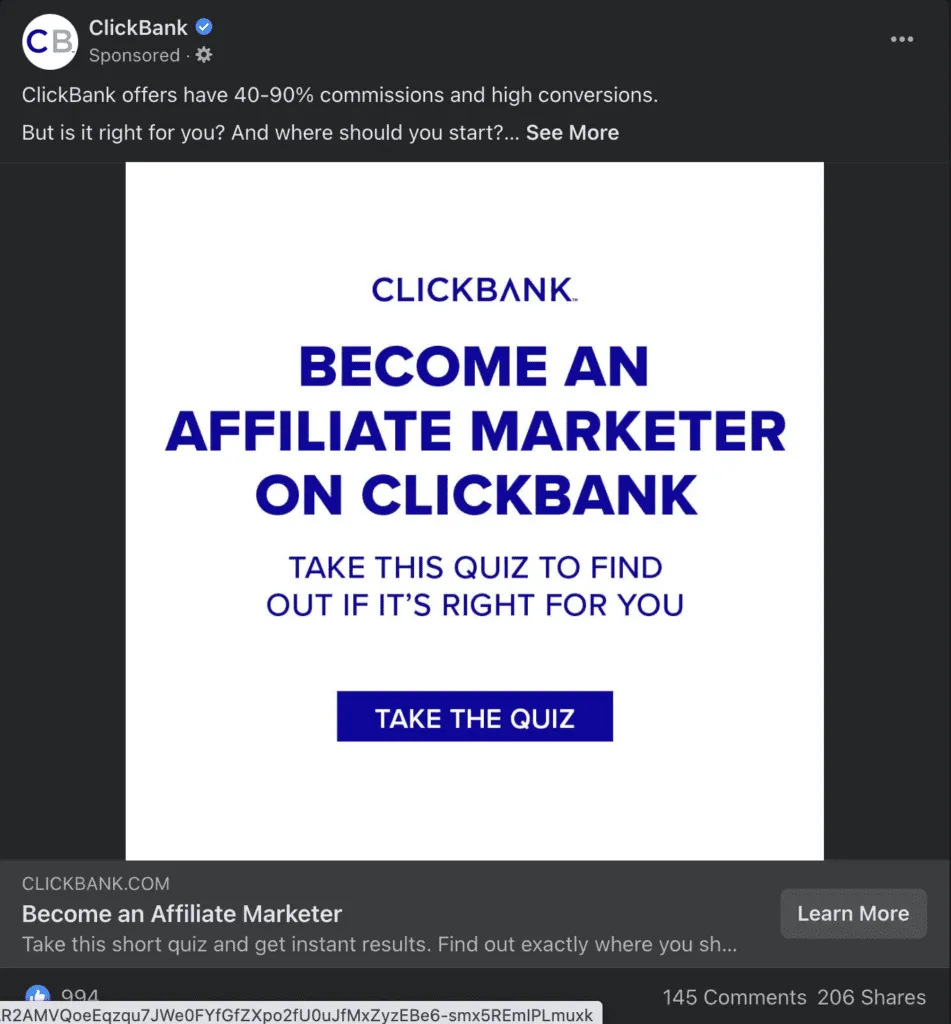
Your ad creative will vary drastically depending on your offer. We see a lot of people testing with static image ads in the beginning. This tends to work really well for sparking curiosity and selling a click to a blog article, advertorial, or other bridge page, which then points to your hoplink (typically with a prominent CTA like an in-text link, banner image, or button).
NOTE: Many ad platforms don’t like ClickBank hoplinks (i.e. tracking links). In fact, some affiliates have had their ad accounts shut down after putting their hoplink directly in the ads. That’s why we always recommend using a bridge page to protect against this!
Try this method the exact same way with a few different interests. You also definitely want to test broad. Try creating ad sets with little to no targeting and run them against single interest campaigns like we’ve set up here.
A lot of times, broader targeting ad sets will work better! When you target more broadly, you are giving Facebooks algorithm larger pools of people to find buyers in!
2) YouTube Ads
YouTube Ads are another huge opportunity for affiliates, many of whom haven’t traditionally looked at the platform before.
Here’s a quick look at the pros and cons of YouTube Ads:
Pros of YouTube Ads:
- Long attention spans = higher LTV
- Video is a powerful ad format (and pairs well with VSLs)
- Easy to target users based on niche and topic
Cons of YouTube Ads:
- Requires strong video creation skills
- Intimidating for beginners – higher learning curve
- Immense pressure on video hooks to convert viewers
The good news is, if you have experience with Facebook (or you followed along in our Facebook Ads tutorial above), then you’ll be right at home with YouTube Ads – YouTube Ads setup process will feel super similar to Facebook!
What’s important to remember here is that creative is VERY different!
With YouTube ads, we obviously have to focus on video, and more specifically pre-roll ads, as opposed to the static ads common on Facebook. (We’ll go into more detail on that in the creative section below.)
For now, let’s talk about the steps of creating a YouTube Ad.
Step 1: Create a New Campaign
To start out, you’ll create a new campaign. I recommend choosing to create a campaign without guidance for the most flexibility and customization.

Next, we will want to select Video, since we are focusing on YouTube in-stream or pre-roll ads.

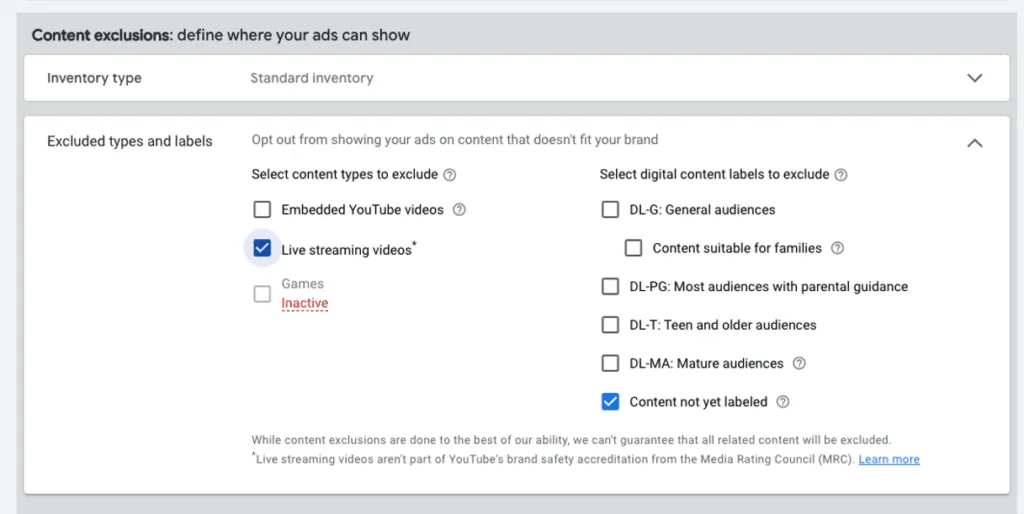
Once you input your budget, we can move down and look at inventory and excluded inventory types.
For the first tab – titled “inventory type” – we are going to leave it as “Standard” inventory.
For excluded types, you can exclude where you see fit. At a minimum, you should exclude live streaming videos, as we typically don’t see great results with that placement anyway!
Step 2: Define Your Audience
Now, it’s time to start inputting details about our target audience. Again, it’s best to be broad here.
For the initial tests, just start by targeting location, age, gender (if applicable), and maybe an interest. Similar to Facebook, we will want to test this against broad, no targeting, or very little targeting ad sets to see what is going to perform best.
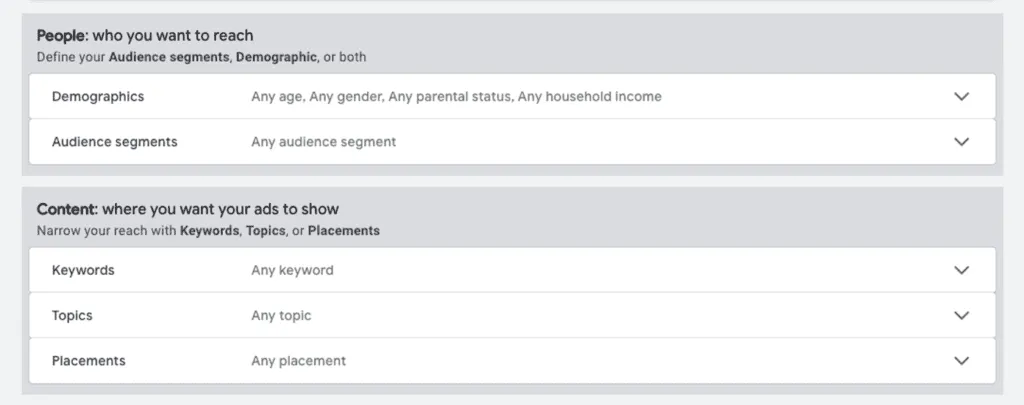
For your initial test, I’d recommend just starting with “Topics.” If you are promoting a weight loss or supplement offer, you could try a topic such as “weight loss,” “keto,” “women’s health,” etc. Think about who your target audience is and add a topic you think they might be interested in. At this stage, it might be worth searching around and actually confirming a few topics.
Step 3: Choose Where the Ads Will Appear
After you’ve dialed in who you want to show your ads to, you’ll need to focus on where you want your ads to be shown!
For this example, we are selecting “Skippable In-Stream Ad.” This will play your ad before, during, or after a user is watching another video. This is the placement I’ve seen top affiliates have the most success in.
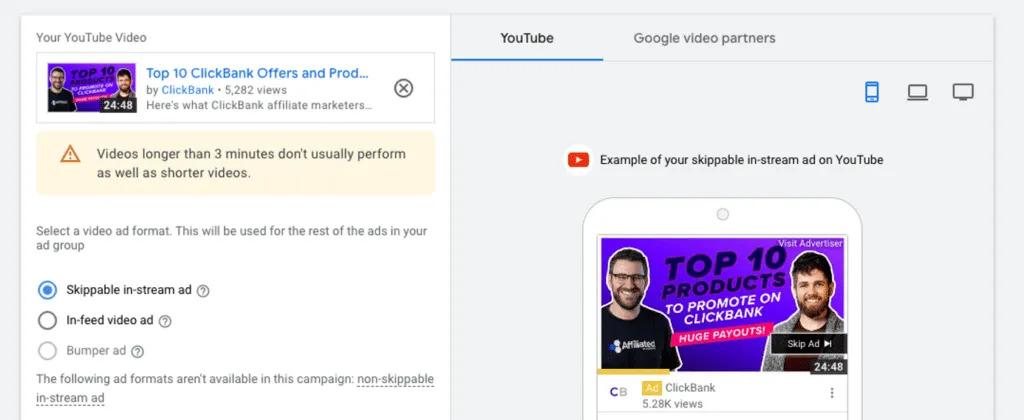
For creative, it’s important to remember that you only have 5 seconds before a user can decide to skip your ad or not.
So, make sure you have a STRONG hook to keep users interested. It’s a good idea to test multiple hooks in the first 5-10 seconds of your video to see where you get higher view and click rates!
Ultimately, the idea here is the same as with Facebook – you’ll want to use an affiliate bridge page for the same reasons above.
Ad accounts can and will be shut down using native hoplinks from ClickBank.
NOTE: To learn more about Facebook vs YouTube ads, check out our comparison guide for the two heavyweight ad platforms!
3) Native Ads
Lately, we’ve seen a lot of top ClickBank affiliates moving over to native ads, including our new native ads platform partner NewsBreak. (They’re actually offering a $500 ad credit to anyone who takes their new native ads course inside of Spark by ClickBank – check it out!)
The idea behind native ads is to place digital ads on publisher websites across the web. These ads blend in with the content on the site, making the user more likely to click and engage with your landing page.
Believe it or not, native is actually the #2 traffic source on ClickBank this year. Here are the pros and cons of native ads for affiliate marketing:
Pros of Native Ads:
- Huge scale potential
- Lower CPMs
- Great for advertorial and TSL funnels
Cons of Native Ads:
- Requires a larger budget for testing and scaling than other channels
- Takes longer to optimize than social
- Attribution can be tricky
Native is a powerful alternative to Meta or YouTube Ads.
Feel free to watch my video on how to use native ads for ClickBank offers for more information on this excellent paid traffic source.
We also have a tutorial on setting up native ads with Outbrain below, so keep reading!
Step 1: Create a New Campaign
Launching a native ads campaign is easier than you might think!
Here is a quick look at the setup you should follow each time inside of Outbrain if you’re looking to acquire cold traffic:
- Campaign 1: Target desktop and tablet in one campaign, choose semi-automatic conversion bid strategy. If you’re targeting across the U.S. as a whole, CPC should be set to $0.60.
- Campaign 2: Target smartphones, choose semi-automatic conversion bid strategy. If you’re targeting across the U.S. as a whole, CPC should be set to $0.35.
At the start of a campaign, that should be all you need – no additional targeting should be layered, and no other toggles should be switched on or off.
For your first week of a campaign, it’s all about collecting data and letting the platform’s algorithm get enough data to optimize.
Step 2: Set Up Your Campaign
Sometimes, over-targeting in your campaign can hurt instead of help. What we’ve seen work best is going broad with the actual targeting, and then choosing creative that will “over-qualify” your audience.
What does that mean?
Think of it as one of those callouts at the beginning of a TV commercial, like the following:
- “Are you over 65?”
- “Tired of dealing with back pain?”
- “Attention, all remote workers!”
With this approach, you’re letting the algorithm have more of an opportunity to optimize your campaign, rather than trying to do its targeting for it.
And as we’ve already discussed, you’ll usually see better results from a campaign when the platform gets to do the optimization.
Step 3: Test and Optimize Your Campaign
Speaking of optimizing, you still have a role to play in making sure your native ads campaign is running optimally.
How do you know if your ads are performing well? Here’s a good benchmark for Outbrain CTRs:
- Desktop & Tablet: CTR above 0.08%
- Mobile: CTR above 0.12%
Of course, as we discussed before, it’s not really about the CTR or the CPC – it’s about your customer acquisition cost (CAC) and your overall ROAS.
So, what can you tweak to improve your campaign’s performance? The three main areas for this are creatives, publishers, and time of day.
Adjusting creative is self-explanatory, but with native ads, you have the unique option of choosing which publishers (i.e. websites) your ads will appear on. A native ad platform like Outbrain has a huge inventory of publishers.
You can actually make manual bid adjustments on publisher sections within your individual campaigns to eke out as much benefit from ad spend as possible. Try bidding up 30-35% for higher-converting sections and bidding down 50% or so for your lower-converting sections.
Lastly, Outbrain shares when your conversions occur by time of day, making time of day another effective lever to pull if you want to improve your native campaign.
Final Thoughts on Media Buying as an Affiliate
I hope this post on paid traffic for affiliate marketing was helpful!
We all know that paid ads are a powerful traffic source for growing your online business, promoting affiliate offers, and getting paid.
With all that in mind, here are a few parting thoughts to consider:
- Are you reinventing the wheel with every offer? (There are general angles and pain points that carry over from one offer to the next, especially within the same niche, so test and collect what works for the long term.)
- Because of spy tools, you may be at risk of competing affiliates or sellers stealing your great ideas. The comeback for that is making original content – if you physically make your own creatives and can prove it to Facebook, they’ll take down the competition’s ads.
- With targeting, at least on YouTube and Facebook, it’s generally best to set a broad audience and let their algorithms do the targeting for you.
And remember, your best friend is ROAS. If you can achieve a ROAS of greater than 1.0, then you’re profitable!
That wraps up this guide to paid ads, but if you’re still trying to decide which affiliate marketing approach is the right fit for you, you can check out our organic traffic vs paid traffic guide!
Or if you’re settled on paid ads and want to learn how to run paid campaigns from the best of the best in affiliate marketing, I highly recommend checking out Spark by ClickBank!
We have top-notch courses on YouTube Ads from experienced Platinum affiliate Ernesto Mejia; a Meta Ads course from our in-house media buyer, Knute Fosso; and a native ads course in partnership with the fantastic team at NewsBreak!
Best of luck on your paid media journey and happy scaling!